Xdialog Chrome Browser Control
- A simple Xdialog that uses the Chrome Control
- Specifying a URL to load
- Specifying a Dynamic URL
- Using Xbasic to Execute Javascript in the Chrome Control
- Using Javascript to Invoke Xbasic
- Using Built In Images
- Referencing Static Resources
- Using the Chrome Debugger
- Setting the Zoom Level of the HTML Document
- Binding Events Programmatically
- Setting/Getting Attributes and Values Programmatically
- Using Google Charts in an Xdialog
- Using the Alpha Anywhere Javascript Library, Styles and 3rd Party Javascript Libraries
- Using the .OnReady() Event
- Summary of Properties and Methods of the Chrome Object
- Methods
- Videos - Using the Chrome Embeddable Browser in Xdialog
Description
Xdialog allows you to embed the Chrome browser control.
Discussion
Xdialog allows you to embed the Chrome browser control. This, in turn, allows you to build some amazing desktop applications using the full power of HTML, CSS3 and Javascript. This is a really fantastic new feature and all developers of desktop applications are strongly encouraged to check it out!
Previously, Alpha Anywhere allowed you to use the Internet Explorer ActiveX control in an Xdialog. While this is still possible, using the Chrome control is now so much easier and more powerful, that it is hard to imagine a scenario under which using the Internet Explorer ActiveX control would be preferable to using the Chrome control.
With the Chrome control hosted in an Xdialog you can:
- Use Xbasic to generate Javascript code and then send the code to the Chrome control to execute
- Use Xbasic to read values from the DOM in the Chrome control (for example, read the value of an input control in the HTML being shown in the Chrome control).
- Use Javascript in the Chrome control to invoke Xbasic
- Open the Chrome debugger to debug your Javascript code
- Set the zoom level of the HTML page
Since the HTML loaded in the Chrome control can use open source Javascript libraries, such as jQuery, you can build really powerful Xdialogs for your desktop applications using a myriad of techniques made possible by third party libraries. (See below for information on the a5_html_page_prepare() function.)
A simple Xdialog that uses the Chrome Control
Create a new script with this code:
dim cp as helper::Chrome
cp.html = <<%html%
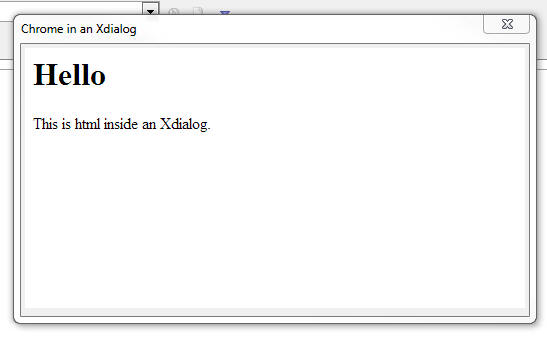
<h1>Hello</h1>
<p>This is html inside an Xdialog.</p>
%html%
dim dlg_title as c
dim dlg_body as c
dlg_body = <<%dlg%
{chrome=100,20cp};
%dlg%
dim dlg_event as c
dlg_title = "Chrome in an Xdialog"
ui_dlg_box(dlg_title,dlg_body,dlg_event)And here is the resulting Xdialog when you run the code.
In the above code, notice that a new object is declared with the
dim cp as helper::Chrome
command. Also notice that the HTML to display in the Chrome control was set by setting the .html property.
You can either set the object's .html property if you want to specify explicit HTML to display, or you can set the .url property (if you want to show a URL - see next example).
Once the Chrome object has been declared, it can be placed in the Xdialog using this Xdialog command:
{chrome=100,20cp};In this above example, the width of the Chrome control is set to 100 'characters' and the height to 20 'lines'.
Notice that the 'cp' in the above command is the name of the helper::Chrome object that was defined.
You can put as many Chrome objects on an Xdialog as you want. For example:
dim cp1 as helper::chrome
dim cp2 as helper::chrome
....
dim cpn as helper::chrome
And then in your Xdialog body:
{chrome=100,20cp1};
{chrome=100,20cp2};
{chrome=100,20cpn};
Specifying a URL to load
dim cp as helper::Chrome
cp.url = "http://www.google.com"

dim dlg_title as c
dim dlg_body as c
dlg_body = <<%dlg%
{stretch=height,width}
{chrome=100,30cp};
%dlg%
dim dlg_event as c
dlg_title = "Chrome in an Xdialog"
ui_dlg_box(dlg_title,dlg_body,dlg_event)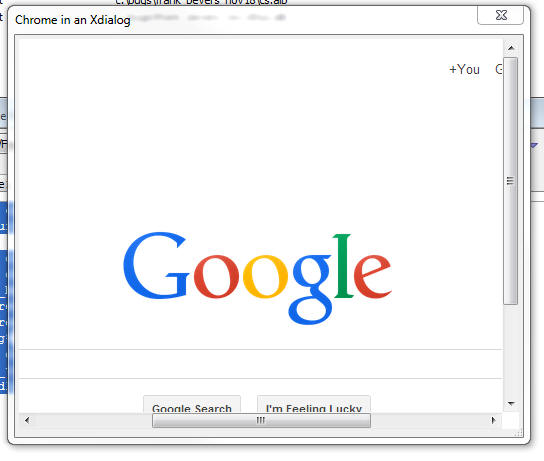
Specifying a Dynamic URL
In this next example we show how the URL property can be dynamically changed after the Xdialog has been rendered.
dim cp as helper::Chrome
cp.url = "http://www.google.com"
dim urls as c
urls = <<%txt%
http://www.google.com
http://www.bing.com
http://www.yahoo.com
%txt%
dim url as c
url = word(urls,1,crlf())
dim dlg_title as c
dim dlg_body as c
dlg_body = <<%dlg%
{startup=urlchanged}
{stretch=width}
[.160url^+urls] <Go!urlchanged>;
{stretch=height,width}
{chrome=173,60cp};
%dlg%
dim dlg_event as c
dlg_event = <<%code%
if a_dlg_button = "urlchanged" then
a_dlg_button = ""
cp.url = url
end if
%code%
dlg_title = "Chrome in an Xdialog"
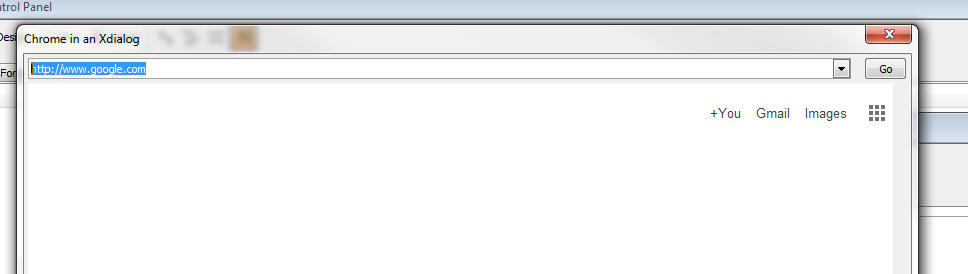
ui_dlg_box(dlg_title,dlg_body,dlg_event)The resulting Xdialog looks like this:
You can type any address into the address bar and then hit the Go button to go to the page.
Using Xbasic to Execute Javascript in the Chrome Control
The Chrome object exposes two methods that allows you to execute Javascript from Xbasic. These are:
- Method
- Description
- .executeJavascript(codetorun)
executes the Javascript asynchronously
- .executeJavascriptResult(codeToRun)
executes the Javascript synchronously and returns the result to Xbasic
Consider the following example of an Xdialog that is hosting the Chrome control, showing some HTML with an input control. We have to Xdialog buttons, one to set the value in the HTML input, and the other to read the value from the HTML input.
dim cp as helper::Chrome
cp.html = <<%html%
Name: <input id="name" />
%html%
dim dlg_title as c
dim dlg_body as c
dlg_body = <<%dlg%
{chrome=40,10cp};
<Set Name!setName> <Read Name!readName>;
%dlg%
dim dlg_event as c
dlg_event = <<%code%
if a_dlg_button = "setName" then
    a_dlg_button = ""
    dim jstorun as c
    dim name as c
    name = ui_get_text("Name","Enter name")
    jstorun = "document.getElementById('name').value = '" + js_escape(name) + "';"
    cp.ExecuteJavascript(jstorun)
else if a_dlg_button = "readName" then
    a_dlg_button = ""
    dim jstorun as c = "document.getElementById('name').value"
    dim result as c
    result = cp.ExecuteJavascriptResult(jstorun)
    ui_msg_box("Notice:","Value read from the HTML is: " + result)
end if
%code%
dlg_title = "Chrome in an Xdialog"
ui_dlg_box(dlg_title,dlg_body,dlg_event)
The important thing to notice in this example is that the Javascript that gets executed here is computed by Xbasic and Xbasic is invoking the Javascript.
Using Javascript to Invoke Xbasic
In this example, rather than using Xbasic to invoke Javascript on the Chrome control, we turn it around and invoke Xbasic from Javascript.
This Xdialog has an event called 'event1' (see code in red below) and the HTML has a button. When the user clicks on the HTML button, the Xdialog event ('event1') is fired.
In order to make this work, a special Javascript function (called xDialogEvent) must be added to the HTML page. The onclick event for the button is then set to:
xDialogEvent('event1')Because it is cumbersome to have to have to add the xDialogEvent() helper function to the HTML yourself, a special helper function can be called to 'prepare' the HTML you pass into the chrome object. For example:
dim cp as helper::Chrome
cp.html = a5_html_page_prepare(<<%html%
<button onclick="xdialogEvent('event1');">Invoke Event on My Parent Xdialog</button>
%html%)
dim cp as helper::Chrome
cp.html = <<%html%
<html>
    <head>
        <script>
        function xDialogEvent(eventName) {
            var client = new XMLHttpRequest();
            client.open('GET', 'a5xdialog:' + eventName,false);
            client.setRequestHeader('My-Custom-Header', 'Some Value');
            client.send();
        }
        </script>
    </head>
    <body>
        <button onclick="xDialogEvent('event1');">Invoke Event on My Parent Xdialog</button>
    </body>
 </html>
%html%

dim dlg_title as c
dim dlg_body as c
dlg_body = <<%dlg%
{chrome=40,10cp};
%dlg%
dim dlg_event as c
dlg_event = <<%code%
if a_dlg_button = "event1" then
    a_dlg_button = ""
    ui_msg_box("Notice","This is Xbasic here. Event1 has just been fired.")
end if
%code%
dlg_title = "Chrome in an Xdialog"
ui_dlg_box(dlg_title,dlg_body,dlg_event)
Writing a mini web server in Xdialog for hosted Chrome Control
A useful pattern for hosting HTML in an XDialog is to use the ParseRules() method of the chrome object to remap HTTP requests to calls into an xbasic function.
This is effectively like having a Mini web server implemented by a single xbasic function.
In the below example, notice that the function returns data type 'A' (any) this allows either a string or a blob to be returned.
The top level page is called index.html, the javascript that the button on the page calls into is a separate JS file, and the image is returned from one of the built-in images serialized to binary data.
dim cr as helper::Chrome

cr.url = "http://localhost/index.html"

dim rules as c
rules = <<%xstr%
replace:
http://localhost/*:=a5xbasic:handledRequest({quoted_wildcard})
paths:
%xstr%
cr.ParseRules(rules)


ui_dlg_box("Mini Server",<<%dlg%
{chrome=150,30cr};
%dlg%)


function handledRequest as a(fullpath as c)
    if fullpath = "index.html" then
	     handledRequest = <<%html%
<script src="myfun.js">
</script>
<body>
<img src="word.png"/><br>
Hello<br>
<button onclick="sayHello()">Say Hello</button>
</body>
%html%
	else if fullpath = "myfun.js" then
	    handledRequest = <<%js%
function sayHello() {
    alert("Hello World!");
}
%js%
	else if fullpath = "word.png" then
	    handledRequest = bitmap_to_png(ui_bitmap_save("$$application.ms.word"))
	else
	   ' Other callbacks
	end if
end function
Posting Data asynchronously back to Xbasic
When invoking Xbasic from javascript, often it is useful to send a payload, for example all the values harvested from controls on the HTML page, for this we will use a POST instead of a GET, and will use the 'a5xbasicasync' protocol as well as mapping rules (in place of using the custom protocols directly).
The replacement rule for a 'POST' supports a placeholder '__value__' for the posted data, and {quoted_wildcard} placeholder for the path (that matches the '*' in the pattern).
In this example, If the URL contains "/post/" in the path (can be any pattern you pick - like "/submit/") will call an xbasic function called handlePost with the remainder of the path and the POST data payload
The Page is populated by the second fallback rule that handles http GET, by mapping that to a call to htmlContent().
dim cr as helper::Chrome
cr.url = "http://localhost/index.html"
dim rules as c
rules = <<%xstr%
replace:
http://localhost/post/*:=a5xbasicasync:handlePost({quoted_wildcard},__value__)
http://localhost/*:=a5xbasic:htmlContent({quoted_wildcard})
paths:
%xstr%
cr.ParseRules(rules)
ui_dlg_box("Posted Data Example",<<%dlg%
{chrome=150,30cr};
<refresh>
%dlg%,<<%code%
if a_dlg_button = "refresh" then
a_dlg_button = ""
cr.Reload(.t.)
end if
%code%)
function htmlContent as a(fullpath as c)
if left(fullpath,10) = "index.html" then
htmlContent = <<%html%
<script>
<!--
function postFormData() {
var client = new XMLHttpRequest();
client.open('POST', '/post/myform', true);
var data = {
firstname: document.getElementById('firstname').value,
lastname: document.getElementById('lastname').value
};
client.send(JSON.stringify(data));
}
-->
</script>
<body>
Firstname <input id="firstname" value="Joe" ></input> <br/>
Lastname <input id="lastname" value="Smith"></input> <br/>
<button onclick="postFormData()">Submit</button>
</body>
%html%
else
' Other callbacks
end if
end function
function handlePost as v(fullpath as c,data as c)
showvar(data,"path = "+fullpath)
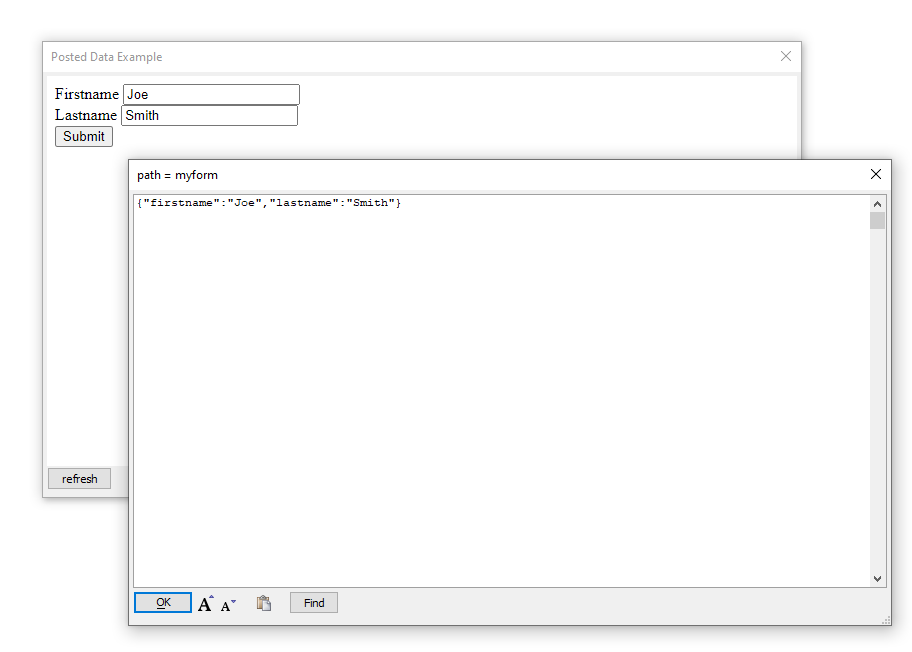
end functionWhen the button is clicked, the javascript packs the input control contents into a JSON payload, and calls the Xbasic handlePost function with the path and the payload.
In this example we just show that Xbasic got the payload, and display the path in the title. In a client application, this would probably be where you commit the data back to a SQL database.
Using Built In Images
Alpha Anywhere comes with a large library of built in images and icons that you might want to use in the HTML that is shown in the Chrome control.
You can easily use built in images using this syntax:
<img src="a5res:images/$$application.chrome.png" />
The portion shown in red is the built in image name.
For example:
dim cp as helper::Chrome
cp.html = <<%html%
<img src="a5res:images/$$code.aScript.png" />
<img src="a5res:images/$$file.open.png" />
<img src="a5res:images/a5_email_people.png" />
%html%

dim dlg_title as c
dim dlg_body as c
dlg_body = <<%dlg%
{chrome=100,20cp};
%dlg%
dim dlg_event as c
dlg_title = "Chrome in an Xdialog"
ui_dlg_box(dlg_title,dlg_body,dlg_event)
And the resulting Xdialog:

Referencing Static Resources
To display image files you can either use the special a5file prefix on the filename, or you can use the standard file:// protocol. However, in order to the use file:// protocol, you have to turn Chrome security off using the command shown in red.
dim cp as helper::Chrome
'in order to use the standard file:// protocol you have to turn
'Chrome's web security off.
'otherwise you can use use the special a5file: command.

cp.flag_web_security_disabled = .t.
cp.html = <<%html%
<img src="a5file:C:\Program Files (x86)\a5V12\a5v12logo.jpg" />
<br>
<img src="file://C:\Program Files (x86)\a5V12\a5v12logo.jpg" />
%html%
dim dlg_title as c
dim dlg_body as c
dlg_body = <<%dlg%
{chrome=100,20cp};
%dlg%
dim dlg_event as c
dlg_title = "Chrome in an Xdialog"
ui_dlg_box(dlg_title,dlg_body,dlg_event)
And the resulting Xdialog:
Using the Chrome Debugger
You can use the Chrome debugger to debug Javascript that is running inside the Chrome control. For example, consider the following Xdialog.
The HTML has a Javascript function that executes a loop. The function uses the 'debugger;' Javascript command to turn on the debugger.
The Xdialog has a button that executes this code:
cp.OpenDevtools()
'cp' is the Chrome object (created by the dim cp as helper::Chrome command), and we are calling the object's .OpenDevTools() method to enable the Chrome Developer tools.
Once the Developer Tools have been opened, we can click the button on the HTML page to run the Javascript and debug into the code.
dim cp as helper::Chrome
cp.html = <<%html%
<script>
function loopTest() {
    debugger;
    for(var i = 1; i < 10; i++) {
        document.getElementById('div1').innerHTML = 'Count: ' + i ;
    }
}
</script>
<button onclick="loopTest();">Start Loop</button>
<div id="div1"></div>
%html%

dim dlg_title as c
dim dlg_body as c
dlg_body = <<%dlg%
{chrome=100,20cp};
<Open debugger!openDebugger>;
%dlg%
dim dlg_event as c
dlg_event = <<%code%
if a_dlg_button = "openDebugger" then
    'open the Chrome debugger
    a_dlg_button = ""
    cp.OpenDevtools()
end if
%code%
dlg_title = "Chrome in an Xdialog"
ui_dlg_box(dlg_title,dlg_body,dlg_event)
Setting the Zoom Level of the HTML Document
You can set/get the zoom level of the HTML shown in the Chrome control by using these methods:
- .GetZoomLevel()
- .SetZoomLevel(level)
The level is a numeric value
Binding Events Programmatically
When you write the HTML that is displayed in the Chrome control you can either add events directly into the HTML markup, or you can bind the events programmatically using Xbasic.
For example, if your HTML included this markup:
<button onclick="myclickevent();">Button1</button>
then, when you ran the Xdialog and clicked on the button, the Javascript function myclickevent() would be invoked.
However if your HTML included this markup:
<button>Button1</button>
then, clicking on the button would do nothing because no event had been bound to the button.
Using methods of the Chrome control, you can bind event handlers to any element.
The syntax is:
<chromeObject>.AddEventListeners(definition)
Where definition is a string in this format:
elementId|eventName|xdialogEventToFire
For example:
dim definition as c
definition = "btn1|click|XbasicEvent1"
cp.AddEventListeners(definition)
The definition string that you pass into the .AddEventListeners() function can be a cr-lf delimited string. This allows you to bind events to multiple elements with a single call to the .AddEventListeners() function.
The above code will bind an onClick event to an element with an id of 'btn1'. When the user clicks the button, the Xdialog event called 'XbasicEvent1' will be fired.
Watch video to see an example of using the .AddEventListners() method.
The .AddEventListners() function can be called before the Xdialog is even instantiated. There is no need to wait for Xdialog and the Chrome control inside the Xdialog to be ready. For example, consider the following script:
dim cp as helper::Chrome
html = <<%html%
<div id="div1">This is div1</div>
<button id="b1">Button1</button>
<button id="b2">Button2</button>
%html%
cp.html = html

'notice that the event binding is defined before the xdialog has even been rendered!
dim mapping as c
mapping = <<%txt%
b1|click|event1
b2|click|event2
%txt%
cp.AddEventListeners(mapping)

dim dlg_title as c = "Binding Multiple Events Handlers at Once"
dim dlg_body as c
dlg_body = <<%dlg%
{chrome=80,10cp};
%dlg%
dim dlg_event as c
dlg_event = <<%code%
if a_dlg_button = "event1" then
    a_dlg_button = ""
    ui_msg_box("Notice","Event 1 has fired")
else if a_dlg_button = "event2" then
    a_dlg_button = ""
    ui_msg_box("Notice","Event 2 has fired")
end if
%code%
ui_dlg_box(dlg_title,dlg_body,dlg_event)
Setting/Getting Attributes and Values Programmatically
When you host a Chrome control in an Xdialog you will often want to manipulate attributes of the HTML that is displayed using Xbasic.
You can obviously do this by using Xbasic to send Javascript to the Chrome control (using the .executeJavascript() method), but a more direct method is available using methods of the Chrome object that let you directly manipulate the DOM.
For example, say you want to set the Inner HTML of a div with the id of 'div1'.
You Xdalog could execute this code
dim js as c
js = "document.getElementById('div1').innerHTML = '" + js_escape("some text") + "';
cp.ExecuteJavascript(js)
However, the .SetInnerHTML() method provides a more direct way of accomplishing this. For example
cp.SetInnerHTML("div1","some text");Similarly you can use the following methods:
- HasElement(elementId)
indicates whether the specified elementId is present
- HasAttribute(elementId,attributeName)
indicates if the specified element has the specified attribute
- GetAttribute(elementId,attributeName)
gets the value of the specified attribute from the specified element
- SetAttribute(elementId,attributeName,attributeValue)
sets the value of an attribute
- GetInnerText(elementId)
gets the inner text property of an element
- GetValue(elementId)
gets the value of element (for example, an INPUT control)
- SetValue(elementId,value)
sets the value of an element
- GetOuterHtml(elementId)
gets the outer html for an element
- GetInnerHtml(elementId)
gets the inner html for an element
- SetInnerHtml(elementId,value)
sets the inner html of an element
Example code
dim cp as helper::Chrome
html = "<div id=\"div1\">This is div1</div>"
cp.html = html
dim dlg_title as c
dim dlg_body as c
dlg_body = <<%dlg%
{chrome=80,10cp};
<Set Inner HTML of div1!setdiv>;
<Set Attributes on div1!setattr>
%dlg%
dim dlg_event as c
dlg_event = <<%code%
if a_dlg_button = "setdiv" then
a_dlg_button = ""
cp.SetInnerHtml("div1","Test Alpha Anywhere's ability to set the Inner HTML of an element.")
else if a_dlg_button = "setattr" then
a_dlg_button = ""
cp.SetAttribute("div1","style","border: solid 1px blue; border-radius: 10px; background: yellow;")
end if
%code%
dlg_title = "Using Google Charts in a Chrome Control in an Xdialog"
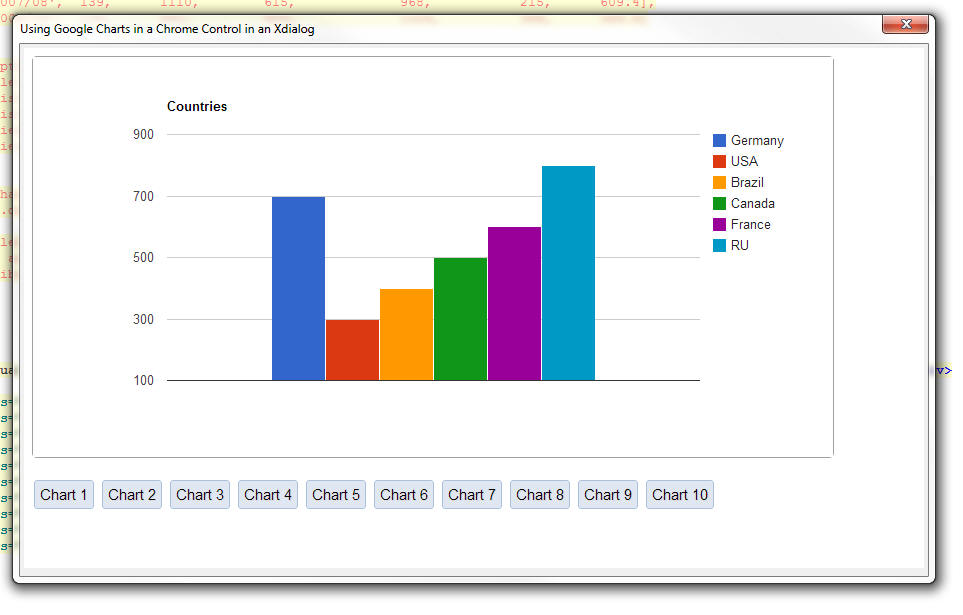
ui_dlg_box(dlg_title,dlg_body,dlg_event)Using Google Charts in an Xdialog
You can use the Google Charts API to add charting to your Xdialogs. For example, the image below shows an Xdialog with a Google chart.
For example, the image below shows an Xdialog with a Google chart.
In addition to watching the above videos, you might also find this video helpful. It shows how Google Charts can be used in a UX Web component, providing additional background information on using the Google API documentation to get working code samples:
Using the Alpha Anywhere Javascript Library, Styles and 3rd Party Javascript Libraries
A huge advantage of being able to use the Chrome control in your Xdialogs is the ability to use Alpha Anywhere Javascript libraries and styles and 3rd party libraries and styles in your Xdialog.
A special helper function called a5_html_page_prepare() makes it very easy to create the HTML page that you will load into the Chrome control with all of the libraries and styles that you want. The function takes some input HTML and then adds the necessary code to your input HTML to load the Javascript and styles that you specify. The function syntax is:
c html = a5_html_page_prepare(C html [,C javascriptLibrariesPublic [,L flagIncludeA5JSlibraries [,C A5StyleName [,C jQueryTheme [,L flagIncludeGoogleJSAPI ]]]]])
where:
- Parameter
- Description
- html
the input HTML that you want to transform
- javascriptLibrariesPublic
a comma delimited list of public Javascript libraries that can be loaded from the Google CDN
- flagIncludeA5JSLibraries
.t./.f. - indicates if you want to include the Alpha Anywhere Javascript libraries
- A5StyleName
the name of an Alpha Anywhere style sheet to load. If you us this option your HTML can use the {style} placeholder to refer to the style name.
- jQueryTheme
Name of a jQuery UI theme. Typically only used if you are also loading the jQuery UI library (see javascriptLibrariesPublic)
- flagIncludeGoogleJSAPI
.t./.f. - indicates if you want to load the Google JSAPI library. If you set this flag to true, the following Google Chart packages will also be loaded: 'table', 'corechart', 'gauge', 'geochart', 'treemap', 'orgchart', 'timeline'
The javascriptLibrariesPublic Parameter
The following libraries can be loaded.
- AngularJS
- Chrome Frame
- Dojo
- Ext Core
- jQuery
- jQuery UI
- MooTools
- Prototype
- script.aculo.us
- SWFObject
- Web Font Loader
For each library that you load, you can specify an optional build number. The syntax is:
libraryName|buildNumber
If you leave out the buildNumber then the most recent build on the Google CDN as of December 1, 2013 is loaded.
If you set the buildNumber to 'internal' then the code is loaded from the Google CDN and then cached locally so that future loads are faster.
Example
dim html as c
html = ""
html = a5_html_page_prepare(html,"jquery|internal,jquery ui|internal,angularjs|internal",.t., "iOS","Sunny")
In the above example:
- jQuery is being loaded from a local version
- jQuery ui is being loaded from a local version
- angularjs is being loaded from a local version
- the Alpha Anywhere Javascript Library is being loaded
- the iOS Alpha Anywhere style is being loaded
- The 'Sunny' jQuery UI theme is being loaded.
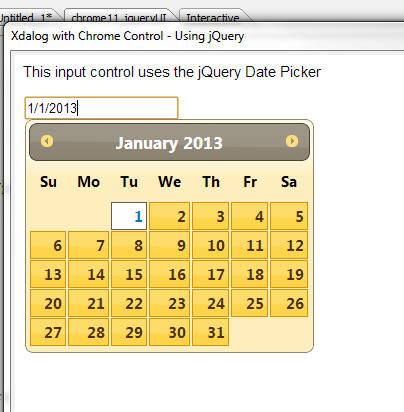
For example, in the code below, the jQuery date picker is used for the input control.
dim html as c
html = <<%html%
<body class="{style}Page">
    <p>This input control uses the jQuery Date Picker</p>
    <input id="dt1" name="dt1" value="1/1/2013"/>
    <script>
    jQuery('#dt1').datepicker(
        {
            onSelect: function(dateText, inst) {
                $e.execute(this,'change')
            }
        }
   );
   </script>
</body>
%html%

html = a5_html_page_prepare(html,"jquery|internal,jquery ui|internal",.t., "MobBlue","Sunny")

dim cp as helper::Chrome
cp.html = html
ui_dlg_box("Xdalog with Chrome Control - Using jQuery",<<%dlg%
{stretch=width,height}
{chrome=150,50cp};
%dlg%,<<%code%
%code%)
And the resulting Xdialog
Using the .OnReady() Event
The Chrome control has an .OnReady() event that fires, and executes Xbasic, once the control has been initialized. For example:
dim cp as helper::Chrome
html = <<%html%
<div id="div1">This is div1</div>
%html%
cp.html = html

'the onReady event fires when the chrome control has been initialized
cp.OnReady = "ui_msg_box(\"Notice\",\"The Chrome control has been initialized.\")"

dim dlg_title as c
dim dlg_body as c
dlg_body = <<%dlg%
{chrome=80,10cp};
%dlg%
dim dlg_event as c
%code%
dlg_title = "Xdialog"
ui_dlg_box(dlg_title,dlg_body,dlg_event)
The .onReady() event executes Xbasic code, not Javascript. If you want to fire Javascript when the Chrome control is ready, simply put an onload event in the tag of the HTML you display in the control.
<body onload="myfunction()">
</body>
Summary of Properties and Methods of the Chrome Object
When you dim a Chrome object, the resulting object instance has many properties and methods that are exposed to Xbasic. For example
dim cp as helper::chrome
When the above Xbasic is executed, the resulting Xbasic variable 'cp' has various method and properties, which are summaries here:
Properties
- flag_web_security_disabled
- flag_allow_file_access_from_url
- flag_allow_universal_file_access_from_url
- flag_page_cache_disabled
- flag_caret_browsing_enabled
- flag_databases_disabled
- flag_plugins_disabled
- flag_java_disabled
- flag_javascript_disabled
- flag_dom_paste_disabled
- flag_encoding_detector_enabled
- flag_drag_drop_disabled
- flag_load_drops_disabled
- flag_history_disabled
- flag_remote_fonts_disabled
- flag_image_load_disabled
Methods
- ExecuteJavascript(code)
executes some Javascript
- ExecuteJavascriptResult(code)
executes some Javascript and returns a result to Xbasic
- Print()
invokes the Chrome control's print dialog
- GoBack()
- GoForward()
- Reload()
reload the current page
- Stop()
stops the page loading
- GetZoomLevel()
gets the numeric zoom level
- SetZoomLevel(level)
sets the zoom level
- OpenDevtools()
opens the Chrome developer tools
- CloseDevtools()
closes the Chrome developer tools
- OnReady(XbasicCode)
executes Xbasic code when the Chrome control has been initialized.
The tasks performed by the following methods could just as well be done by using the .ExecuteJavascript() or .ExecuteJavascriptResult() methods. However, since these methods that go directly against the DOM without having to execute Javascript, they are more convenient to use.
- HasElement(elementId)
indicates whether the specified elementId is present
- HasAttribute(elementId,attributeName)
indicates if the specified element has the specified attribute
- GetAttribute(elementId,attributeName)
gets the value of the specified attribute from the specified element
- SetAttribute(elementId,attributeName,attributeValue)
sets the value of an attribute
- GetInnerText(elementId)
gets the inner text property of an element
- GetValue(elementId)
gets the value of element (for example, an INPUT control)
- SetValue(elementId,value)
sets the value of an element
- GetOuterHtml(elementId)
gets the outer html for an element
- GetInnerHtml(elementId)
gets the inner html for an element
- SetInnerHtml(elementId,value)
sets the inner html of an element
- AddEventListeners(definition)
binds an event handler to an element. See section above 'Binding events programmatically'
- DropEventListeners(elementId)
DropEventListeners(elementId)
Videos - Using the Chrome Embeddable Browser in Xdialog
Xdialog allows users who are building desktop applications to create very powerful 'screens' to prompt for and display information to users. You can now embed Google's Chrome browser directly into your Xdialogs. This means that you can use the full power of HTML, CSS3 and Javascript to create amazing looking Xdialog screen. When you embed the Chrome control in an Xdialog you can easily respond to events in the HTML with either Javascript of Xbasic code. You can also easily send events from Xbasic to the HTML that is displayed in the embedded Chrome control.
If you have used Xdialog in your desktop applications in the past, this new feature will open up many exiting possibilities.